To create the illuminated text of the annunciator, I've painted one side of a piece of lexan and then milled the text into the paint. behind the lexan will be a piece of material to keep the individual LEDs from illuminating their neighboring indicators and then a PCB where the LEDs will be mounted. behind that I'll somehow attach the rest of the circuit in a sensible way.
Here's the design of the front panel, LED locations and the light fence:
From that I created some toolpaths with Vectric's excellent Cut2D software. Cut2D also lets you preview the piece being milled. The side that is being milled is the side with the black paint on it, hence the backwards lettering. The holes on the side will be used to attach the circuit board as well as attach the annunciator to the panel, once that's built.
Here's the light fence after milling into 1/4" pine:
After painting the lexan I let it dry overnight and milled it the next evening. I wasn't able to secure it to my table as well as I would have liked so mid way through the end mill got to close to the edge of the material and started freaking out. I need to head to rockler and buy some 1/4" tie down thing-a-majigs. In any case, it didn't turn out too bad. I can use this piece for testing.
As you can see, it didn't turn out that bad. There is quite a bit of chipping from the paint as you can see in this closeup of the back
BUT, it's not that bad. The paint can says you get full chip resistance after 7 days so I think I'll try again then. I have an 8 x 6" sheet that I painted. I may also try painting more layers on another sheet since a bit of light still shines through. I'm pretty pleased by the initial results though.
Next up, I'll work on the PCB that the LEDs will mount to.
Showing posts with label X-Plane. Show all posts
Monday, September 27, 2010
Sunday, September 26, 2010
Annunciator status update
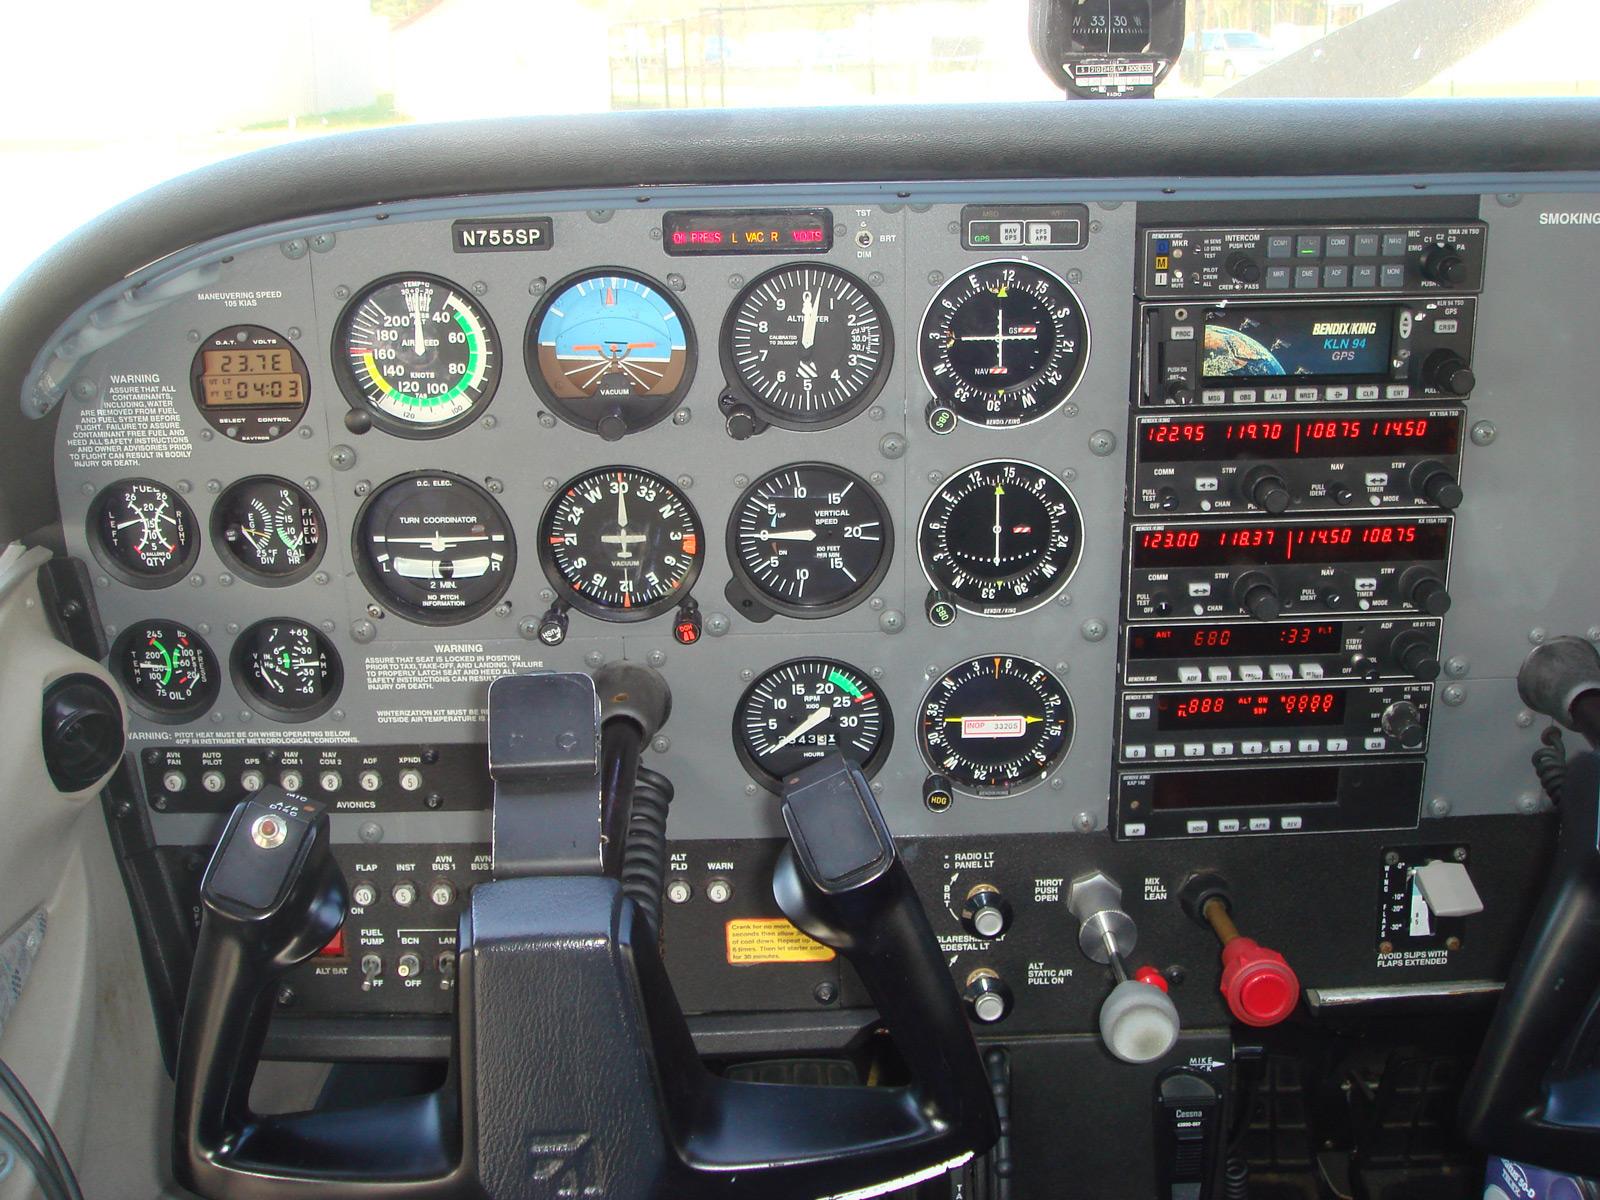
When I first set out to make this annunciator, I wanted to make it look exactly like it does in X-Plane. During development I realized that the X-Plane annunciator does not look or function like the real thing at all. The sim version has 8 indicators: Generator, Battery, Fuel Quantity, Parking Brakes, Oil Pressure, Oil Temperature, Low vacuum and Autopilot disconnect. With the engine stopped and both alternator and battery switches on, only the generator indicator is on. I may not understand what the low vacuum or oil pressure indicators are supposed to mean, but it seems that with no engine running, there shouldn't be any vacuum or oil pressure. I decided to model my annunciator on the real thing. I found a bunch of pictures online of an actual cessna 172 cabin and found it only had a few indicators on it. Here's one such picture showing the bottom row of indicators illuminated: Oil Press, Left and Right Vaccum and Volts. Using this resource on cessna instruments, I was able to discern the top row that indicates low fuel level on both left and right tanks. Thankfully the real annunciator has 8 indicators as well since the left and right indicators just have an L and R light next to the name of the indicator. This means I can use the same hardware as the original design built to mimic the simulator's annunciator. The lights are as follows: L, Low Fuel, R, Oil Press, L, Vac, R, Volts.
My next hurdle after designing the firmware was to drive it correctly. X-Plane does offer some datarefs for the annunciators, but they don't always work correctly. I, instead, read the raw values that the indicator would be concerned about and if that is at a value that would illuminate the indicator, I light it up. I've made sure to check if there is actually bus voltage as well, so that no indicators will light if there isn't any electricity on the bus. Using my method, I can follow the cessna 172 startup checklist to a T! awesome.
Here's a picture of my prototype on a breadboard:
It's a very basic circuit consisting of a PIC18F4550 configured to work as a USB device, the connector for programming it, 2 input buttons that will be connected to a single switch with three modes( test, brt, dim), and output to 8 LEDs. For the finished product I'll have more LEDs depending on how big the text I'm trying to illuminate is which means I may have to add some transistors. Once I get the hardware more fleshed out I'll be able to do some tests with lighting.
Stay tuned for the results of my milling adventures to make the front glass and the light fence in back.
My next hurdle after designing the firmware was to drive it correctly. X-Plane does offer some datarefs for the annunciators, but they don't always work correctly. I, instead, read the raw values that the indicator would be concerned about and if that is at a value that would illuminate the indicator, I light it up. I've made sure to check if there is actually bus voltage as well, so that no indicators will light if there isn't any electricity on the bus. Using my method, I can follow the cessna 172 startup checklist to a T! awesome.
Here's a picture of my prototype on a breadboard:
It's a very basic circuit consisting of a PIC18F4550 configured to work as a USB device, the connector for programming it, 2 input buttons that will be connected to a single switch with three modes( test, brt, dim), and output to 8 LEDs. For the finished product I'll have more LEDs depending on how big the text I'm trying to illuminate is which means I may have to add some transistors. Once I get the hardware more fleshed out I'll be able to do some tests with lighting.
Stay tuned for the results of my milling adventures to make the front glass and the light fence in back.
Friday, September 24, 2010
New project: the Cessna 172 Annunciator for X-Plane
I am a flight sim geek as well as an electronics and computer geek, which means at some point I'm bound to make my own flight simulator, so why not start now.
My ultimate goal is a replica general aviation cockpit that is easy to use for the end user as well as realistic. In the past I've created some rudimentary flight simulator controls with switches, arduinos and fake COM ports over USB. This worked pretty well but is very finicky if something gets unplugged or you don't guess the correct COM port number when running the driver program. This does not comply with my easy to use requirement. Serial communication (COM ports) is very easy to work with from a firmware and software perspective. You write bytes and read bytes. The downside is speed and setup costs though you can program around searching for the correct COM port to a certain extent, but it's a pain in the ass.
Enter USB. Fast, plug and play, configurable but slightly more complicated to set up. I've decided to go the USB route since computers don't even come with serial ports anymore. Welcome to 1996, Me.
My first foray into USB will also be my first test of the X-Plane SDK and plugin system. To keep things relatively simple, I'm going to make an annunciator. It's the lights on the panel that light up if something needs attention, like low fuel or low oil pressure. This will demonstrate gathering and sending data from the simulator to the hardware as well as sending data from the hardware back to the simulator and activating commands on the sim. The hardware to sim data will be a test button that illuminates all of the annunciator lights. Once I get this working, expanding to other more complicated functions is really just slightly modifying the framework that this project will set up.
The next few posts will probably be rapid fire, since I'm writing them all from past notes.
My ultimate goal is a replica general aviation cockpit that is easy to use for the end user as well as realistic. In the past I've created some rudimentary flight simulator controls with switches, arduinos and fake COM ports over USB. This worked pretty well but is very finicky if something gets unplugged or you don't guess the correct COM port number when running the driver program. This does not comply with my easy to use requirement. Serial communication (COM ports) is very easy to work with from a firmware and software perspective. You write bytes and read bytes. The downside is speed and setup costs though you can program around searching for the correct COM port to a certain extent, but it's a pain in the ass.
Enter USB. Fast, plug and play, configurable but slightly more complicated to set up. I've decided to go the USB route since computers don't even come with serial ports anymore. Welcome to 1996, Me.
My first foray into USB will also be my first test of the X-Plane SDK and plugin system. To keep things relatively simple, I'm going to make an annunciator. It's the lights on the panel that light up if something needs attention, like low fuel or low oil pressure. This will demonstrate gathering and sending data from the simulator to the hardware as well as sending data from the hardware back to the simulator and activating commands on the sim. The hardware to sim data will be a test button that illuminates all of the annunciator lights. Once I get this working, expanding to other more complicated functions is really just slightly modifying the framework that this project will set up.
The next few posts will probably be rapid fire, since I'm writing them all from past notes.
Subscribe to:
Posts (Atom)